That MipMaps Is | How To Fix a MipMaps
Hello everyone!
In this tutor you’ll learn what Mipmap is, why soap appears in games, and how to fix black/white artifacts as well as excessive sharpness on plant textures and any other objects using alpha channels.
Lesson start. Theory
First, let’s understand what causes these problems. You may have noticed the artifact only appears when moving away from objects because engines use a technique called “Mipmap”. Mipmap is a set of pre-calculated images of one texture, each subsequent image reduced in resolution by half. This technique is used in computer graphics to improve texture quality and performance by quickly selecting the appropriately sized texture depending on the distance between the camera and the object. Simply put, MipMaps are texture LODs. Everyone knows that for decades every engine uses LODs that replace mesh geometry with less detailed ones—the farther the object, the more optimized mesh is rendered since details are harder to see. But not everyone knows textures have Mipmaps too. And it’s exactly because of them we see blurry/soapy textures in games. If the streaming system can’t keep up (slow HDD, lack of RAM/VRAM, or bad developer choices), it fails to swap low mipmap for high mipmap in time. When we import textures into the engine, it automatically generates mipmaps. The number depends on the original resolution. For example: a 4096x4096 texture generates 13 mipmaps. That’s why the original file size differs greatly from the in-engine size. But thanks to mipmaps, video memory consumption drops dramatically during rendering each frame. Important note: for mipmap generation, texture resolution must follow a geometric progression with denominator 2, e.g., 512x512, 1024x1024, 2048x2048, etc.
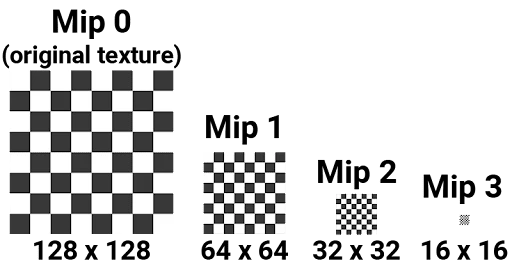
Textures without mipmaps look too sharp at distance and produce noise.
Fixing the texture
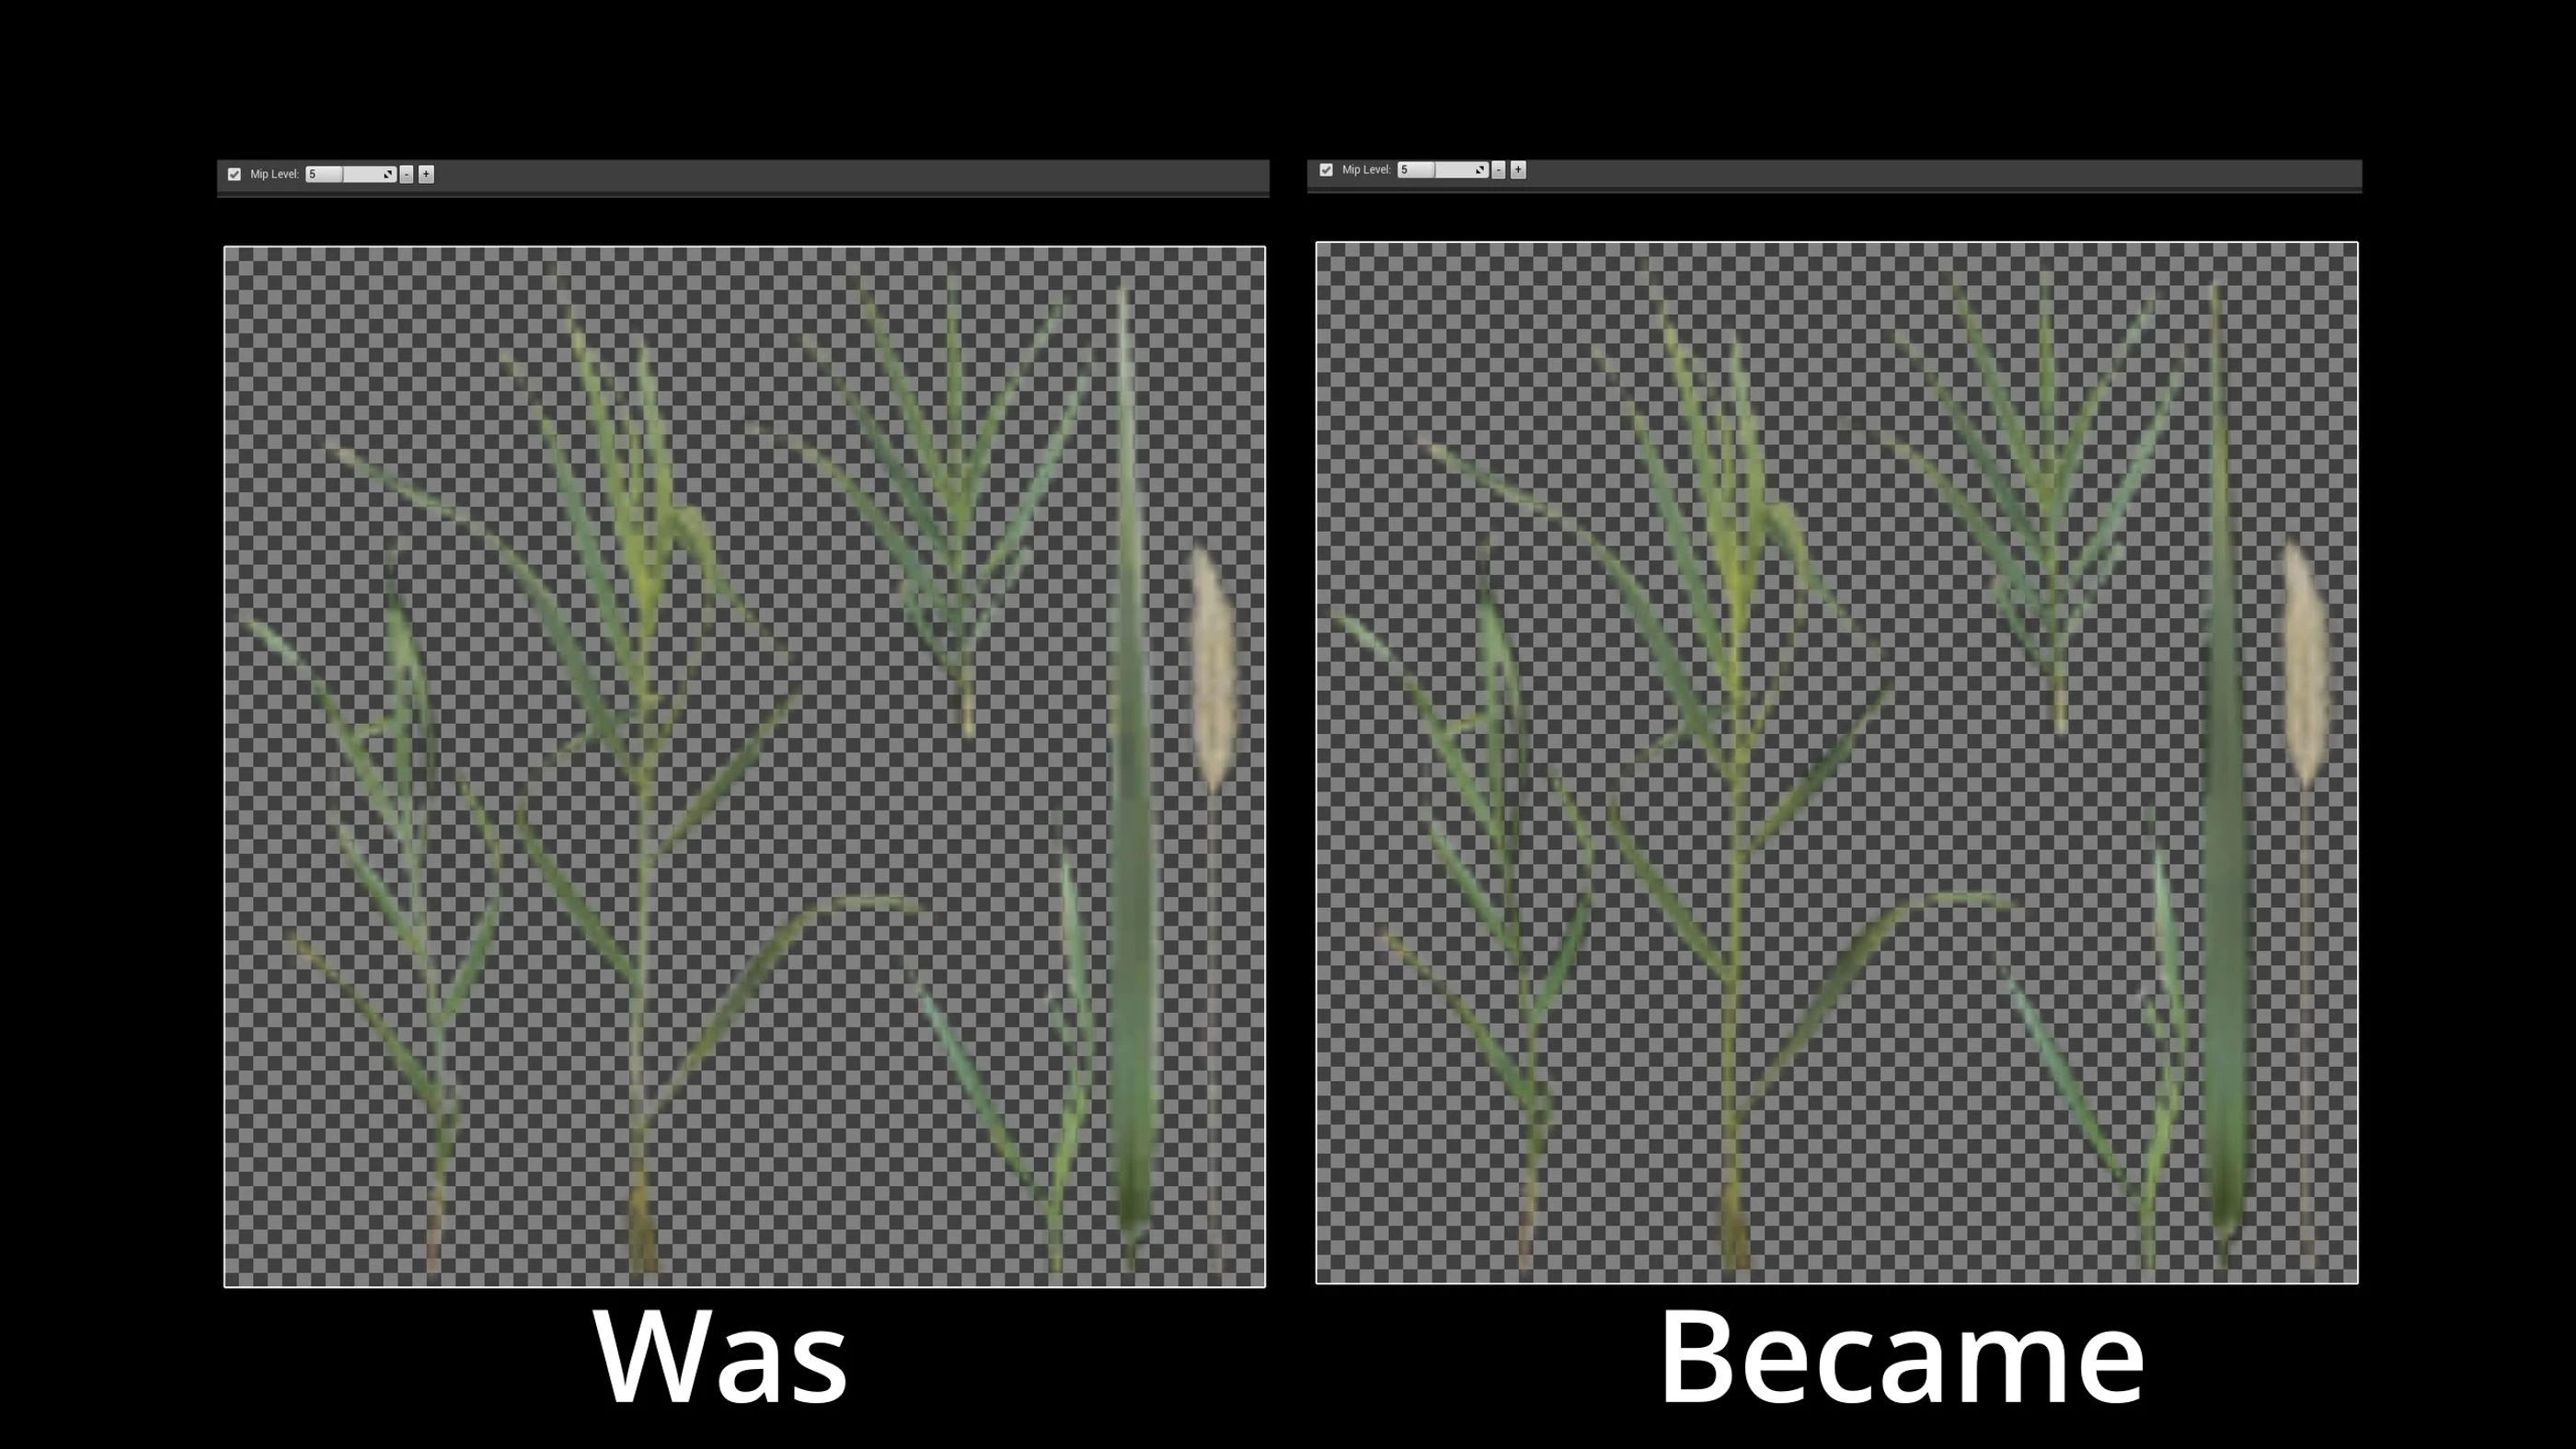
Now, with this knowledge, open the color texture of your vegetation, or any object, in your engine and check how its mipmaps look. If you have no mipmaps due to wrong resolution, you’ll need to fix the resolution in Photoshop first. If the problem is mipmap-related, starting from a certain level, plant outlines will look strange—typically green, black, or white borders. This happens due to the engine’s automatic mipmap generation method and also with poorly edited textures, like the grass atlas you made. I highlight 2 main errors causing incorrect mipmaps: first—if there’s shine or incompletely cropped background at grass edges, the engine treats it as important and preserves it across mipmaps, causing artifacts; second—objects too close to each other or to texture edges, leading to color bleeding. To confirm the issue is mipmaps, temporarily disable them in texture settings.
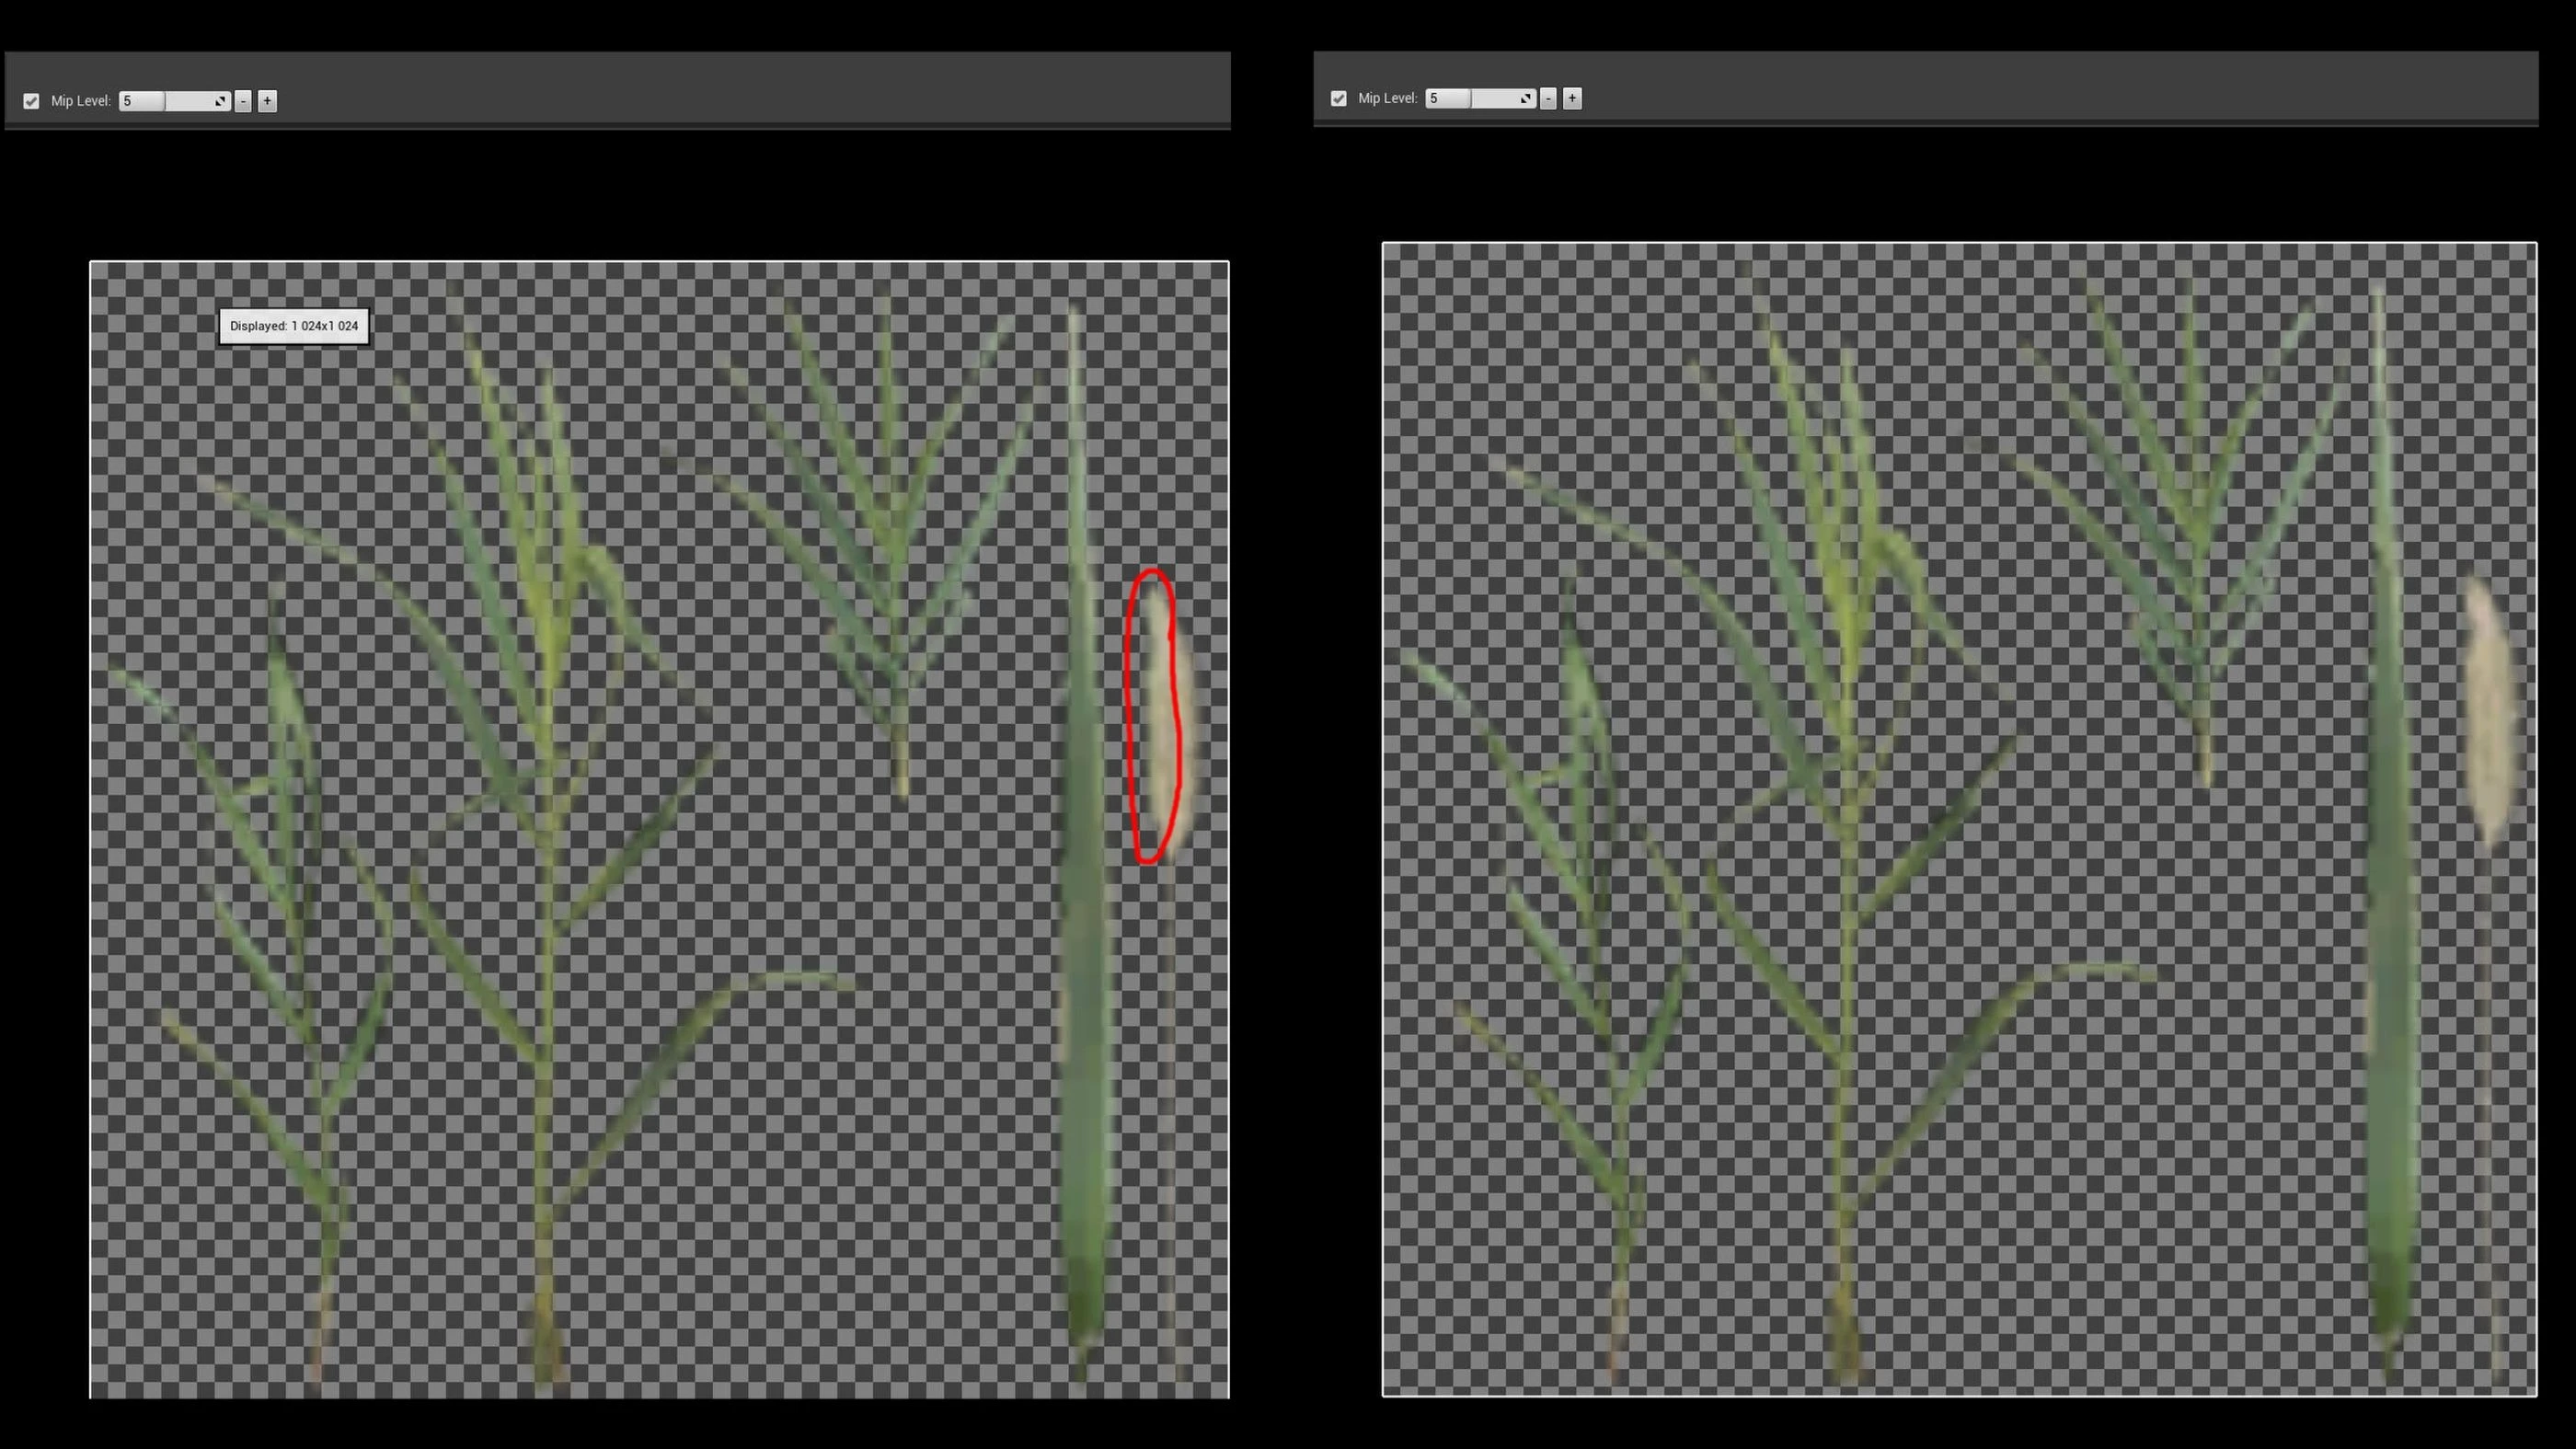
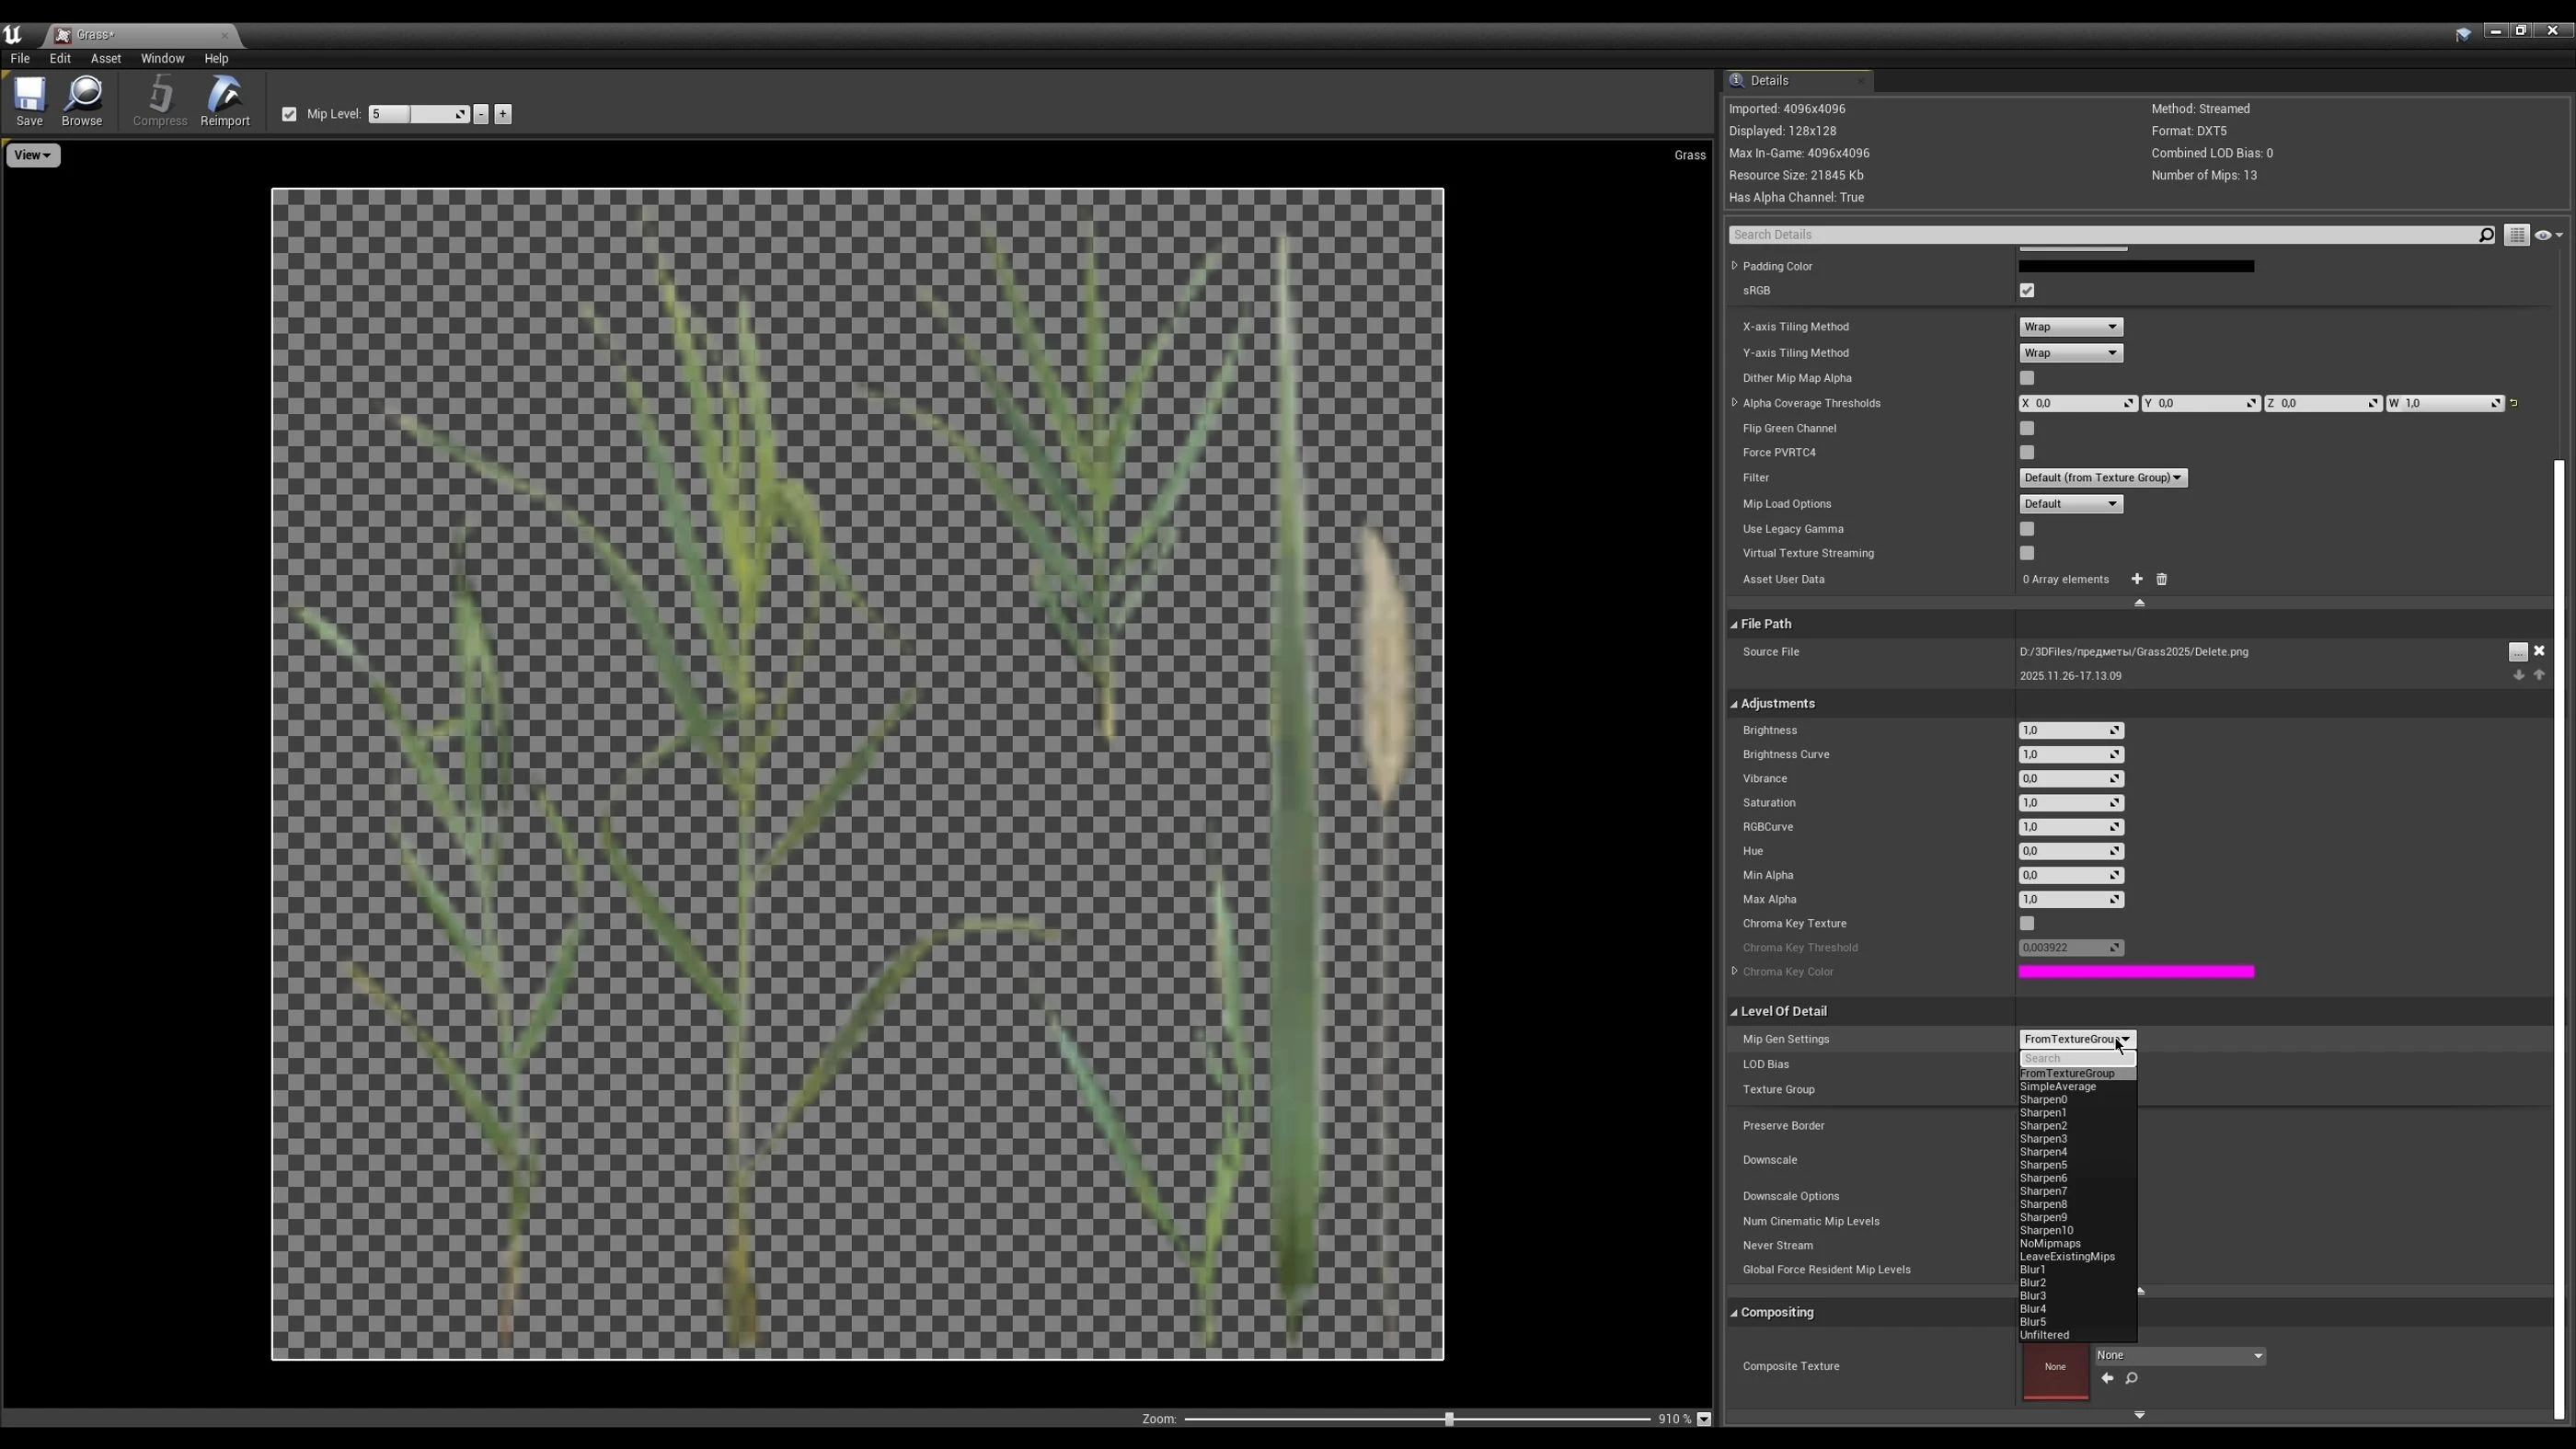
There you can also change generation methods—this is the laziest fix attempt; experiment, often Megascans vegetation fixes this way. If not, proceed to direct texture editing.
Work in Photoshop
Now open Photoshop to fix the texture. Ensure distance between objects and they aren’t too close to texture edges. Don’t overdo it to avoid low texel density. If needed, select the object, move to a new layer, and fix, or fix the layer directly if you have the source. Process object edges with eraser or clone stamp if there are obvious flaws. Select the problematic layer → Layer → Matting → Defringe, pick a value randomly—higher value increases fix chance. Also try other “Matting” options.
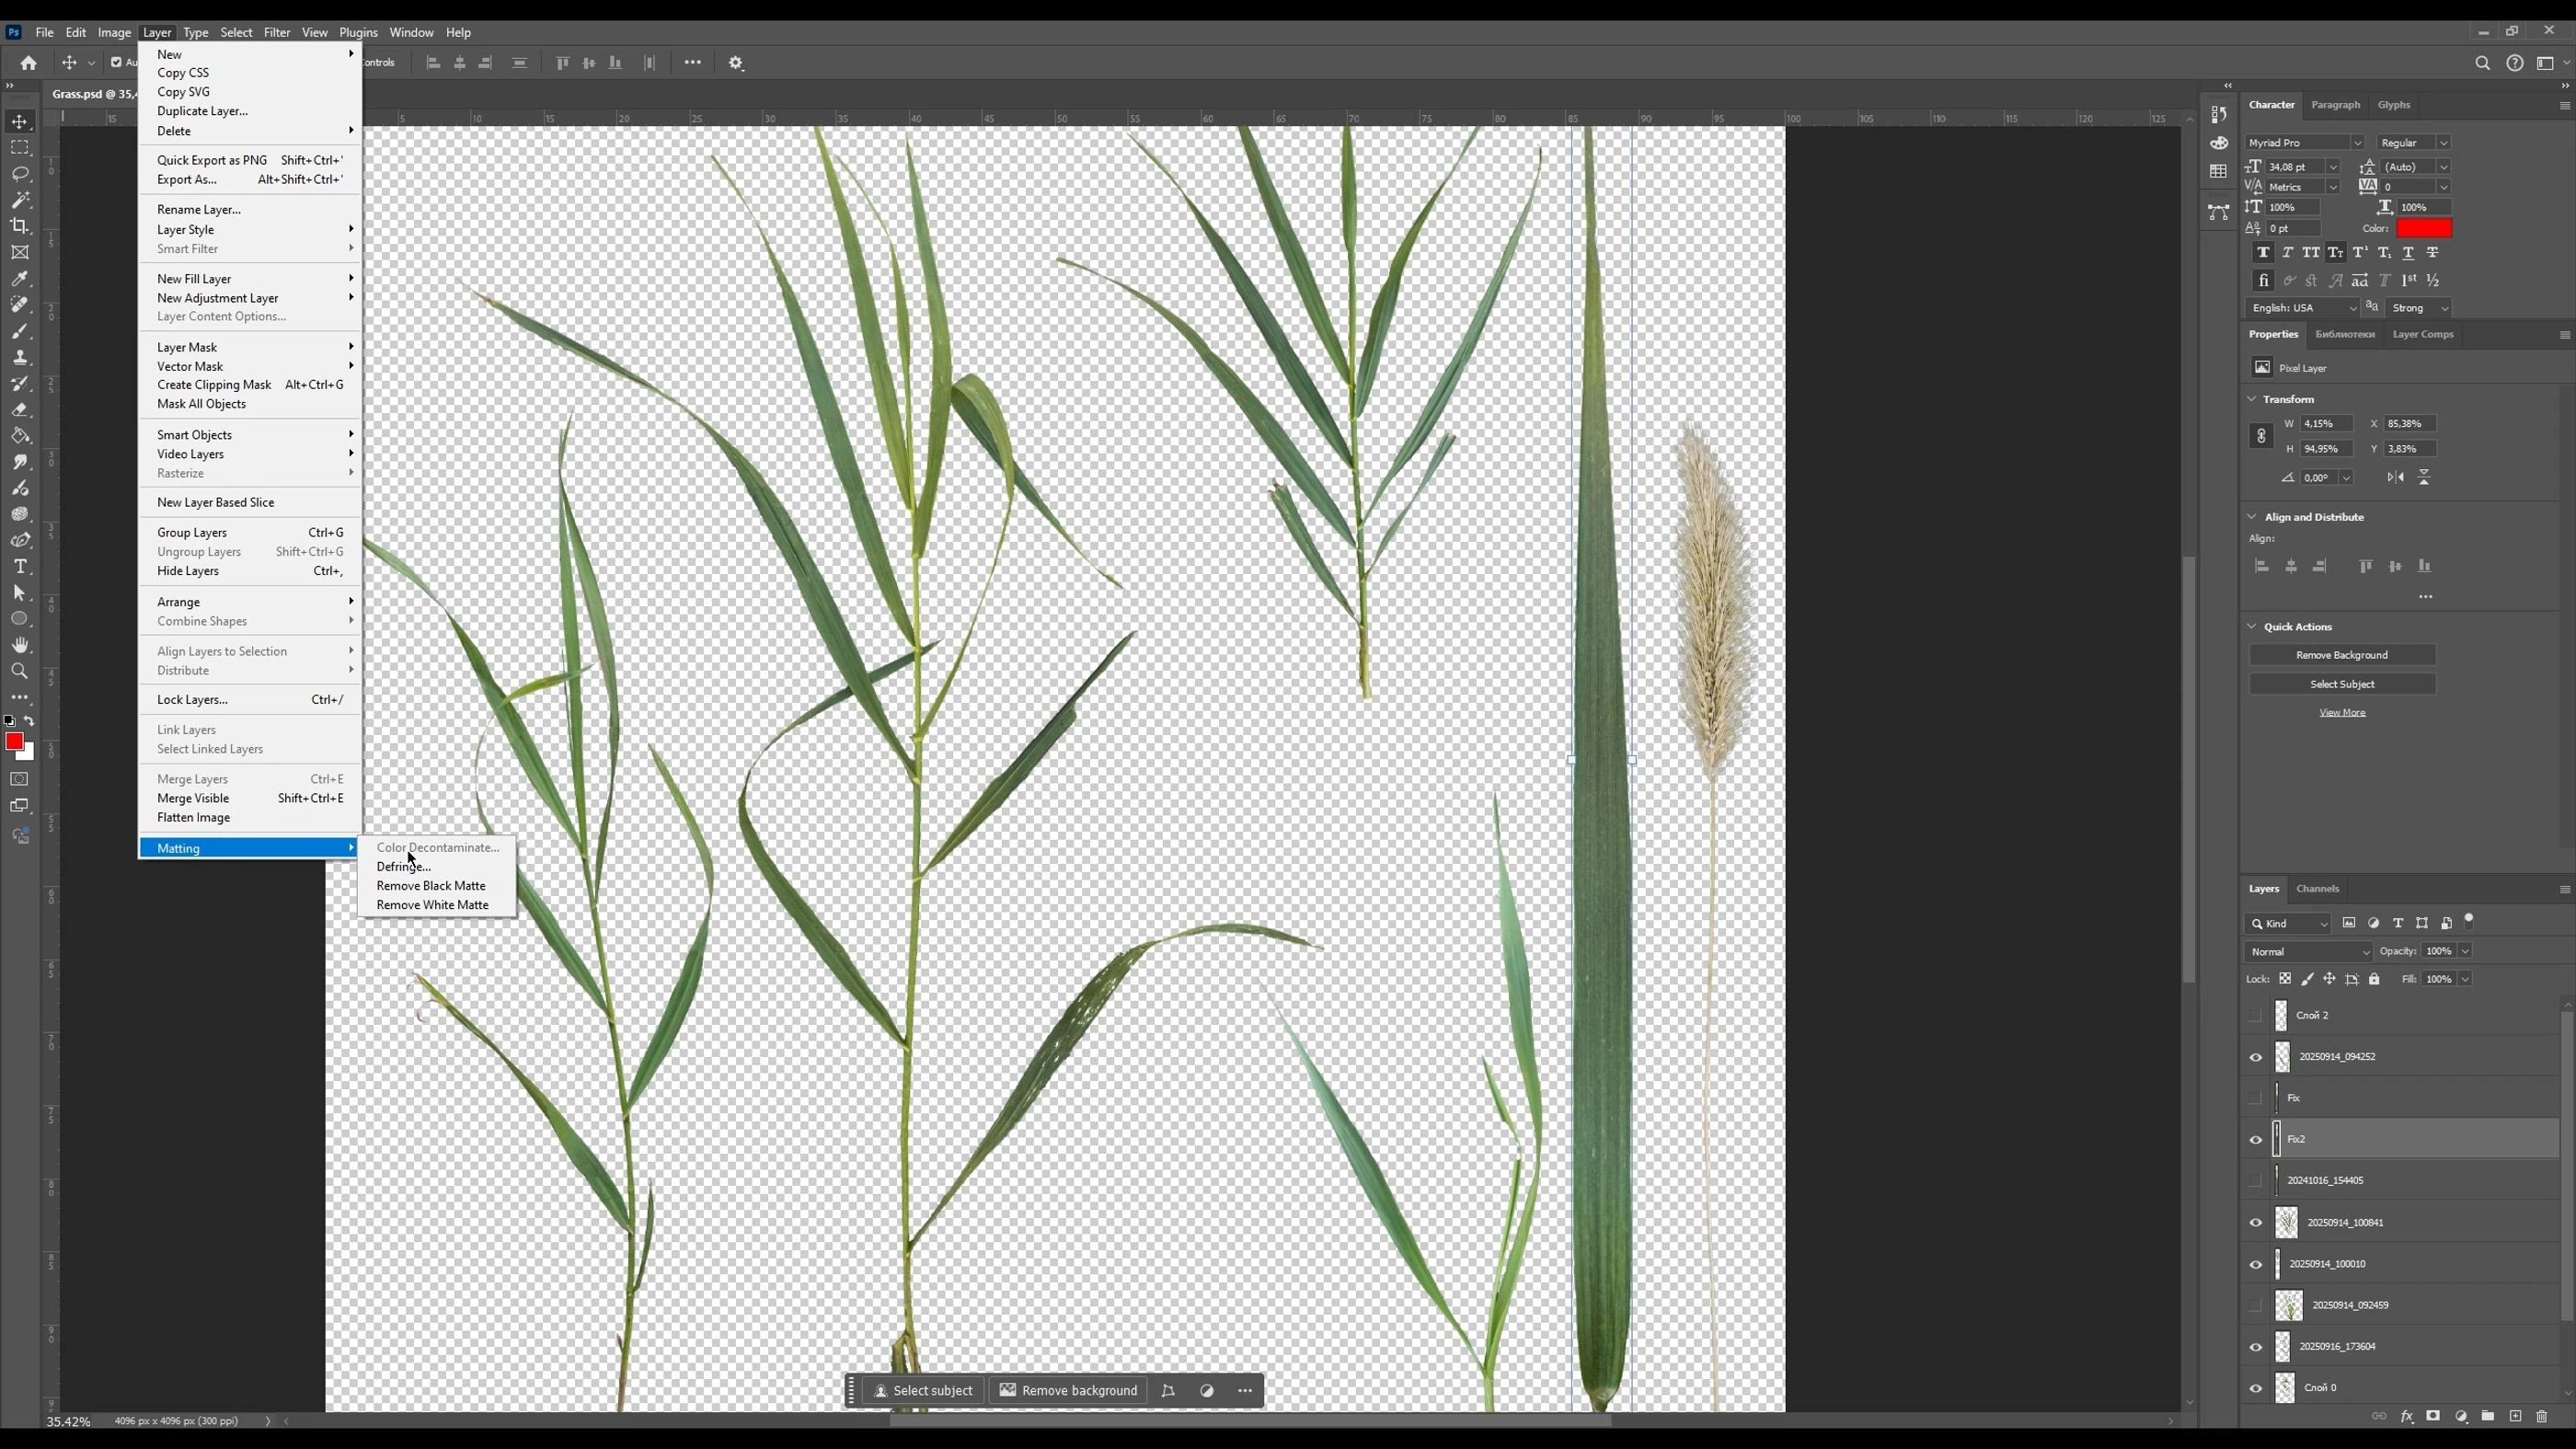
Reimport the texture into the engine, check the result. If not fixed first try—repeat.
That’s all! Write in comments what tutorial topics you want to see.
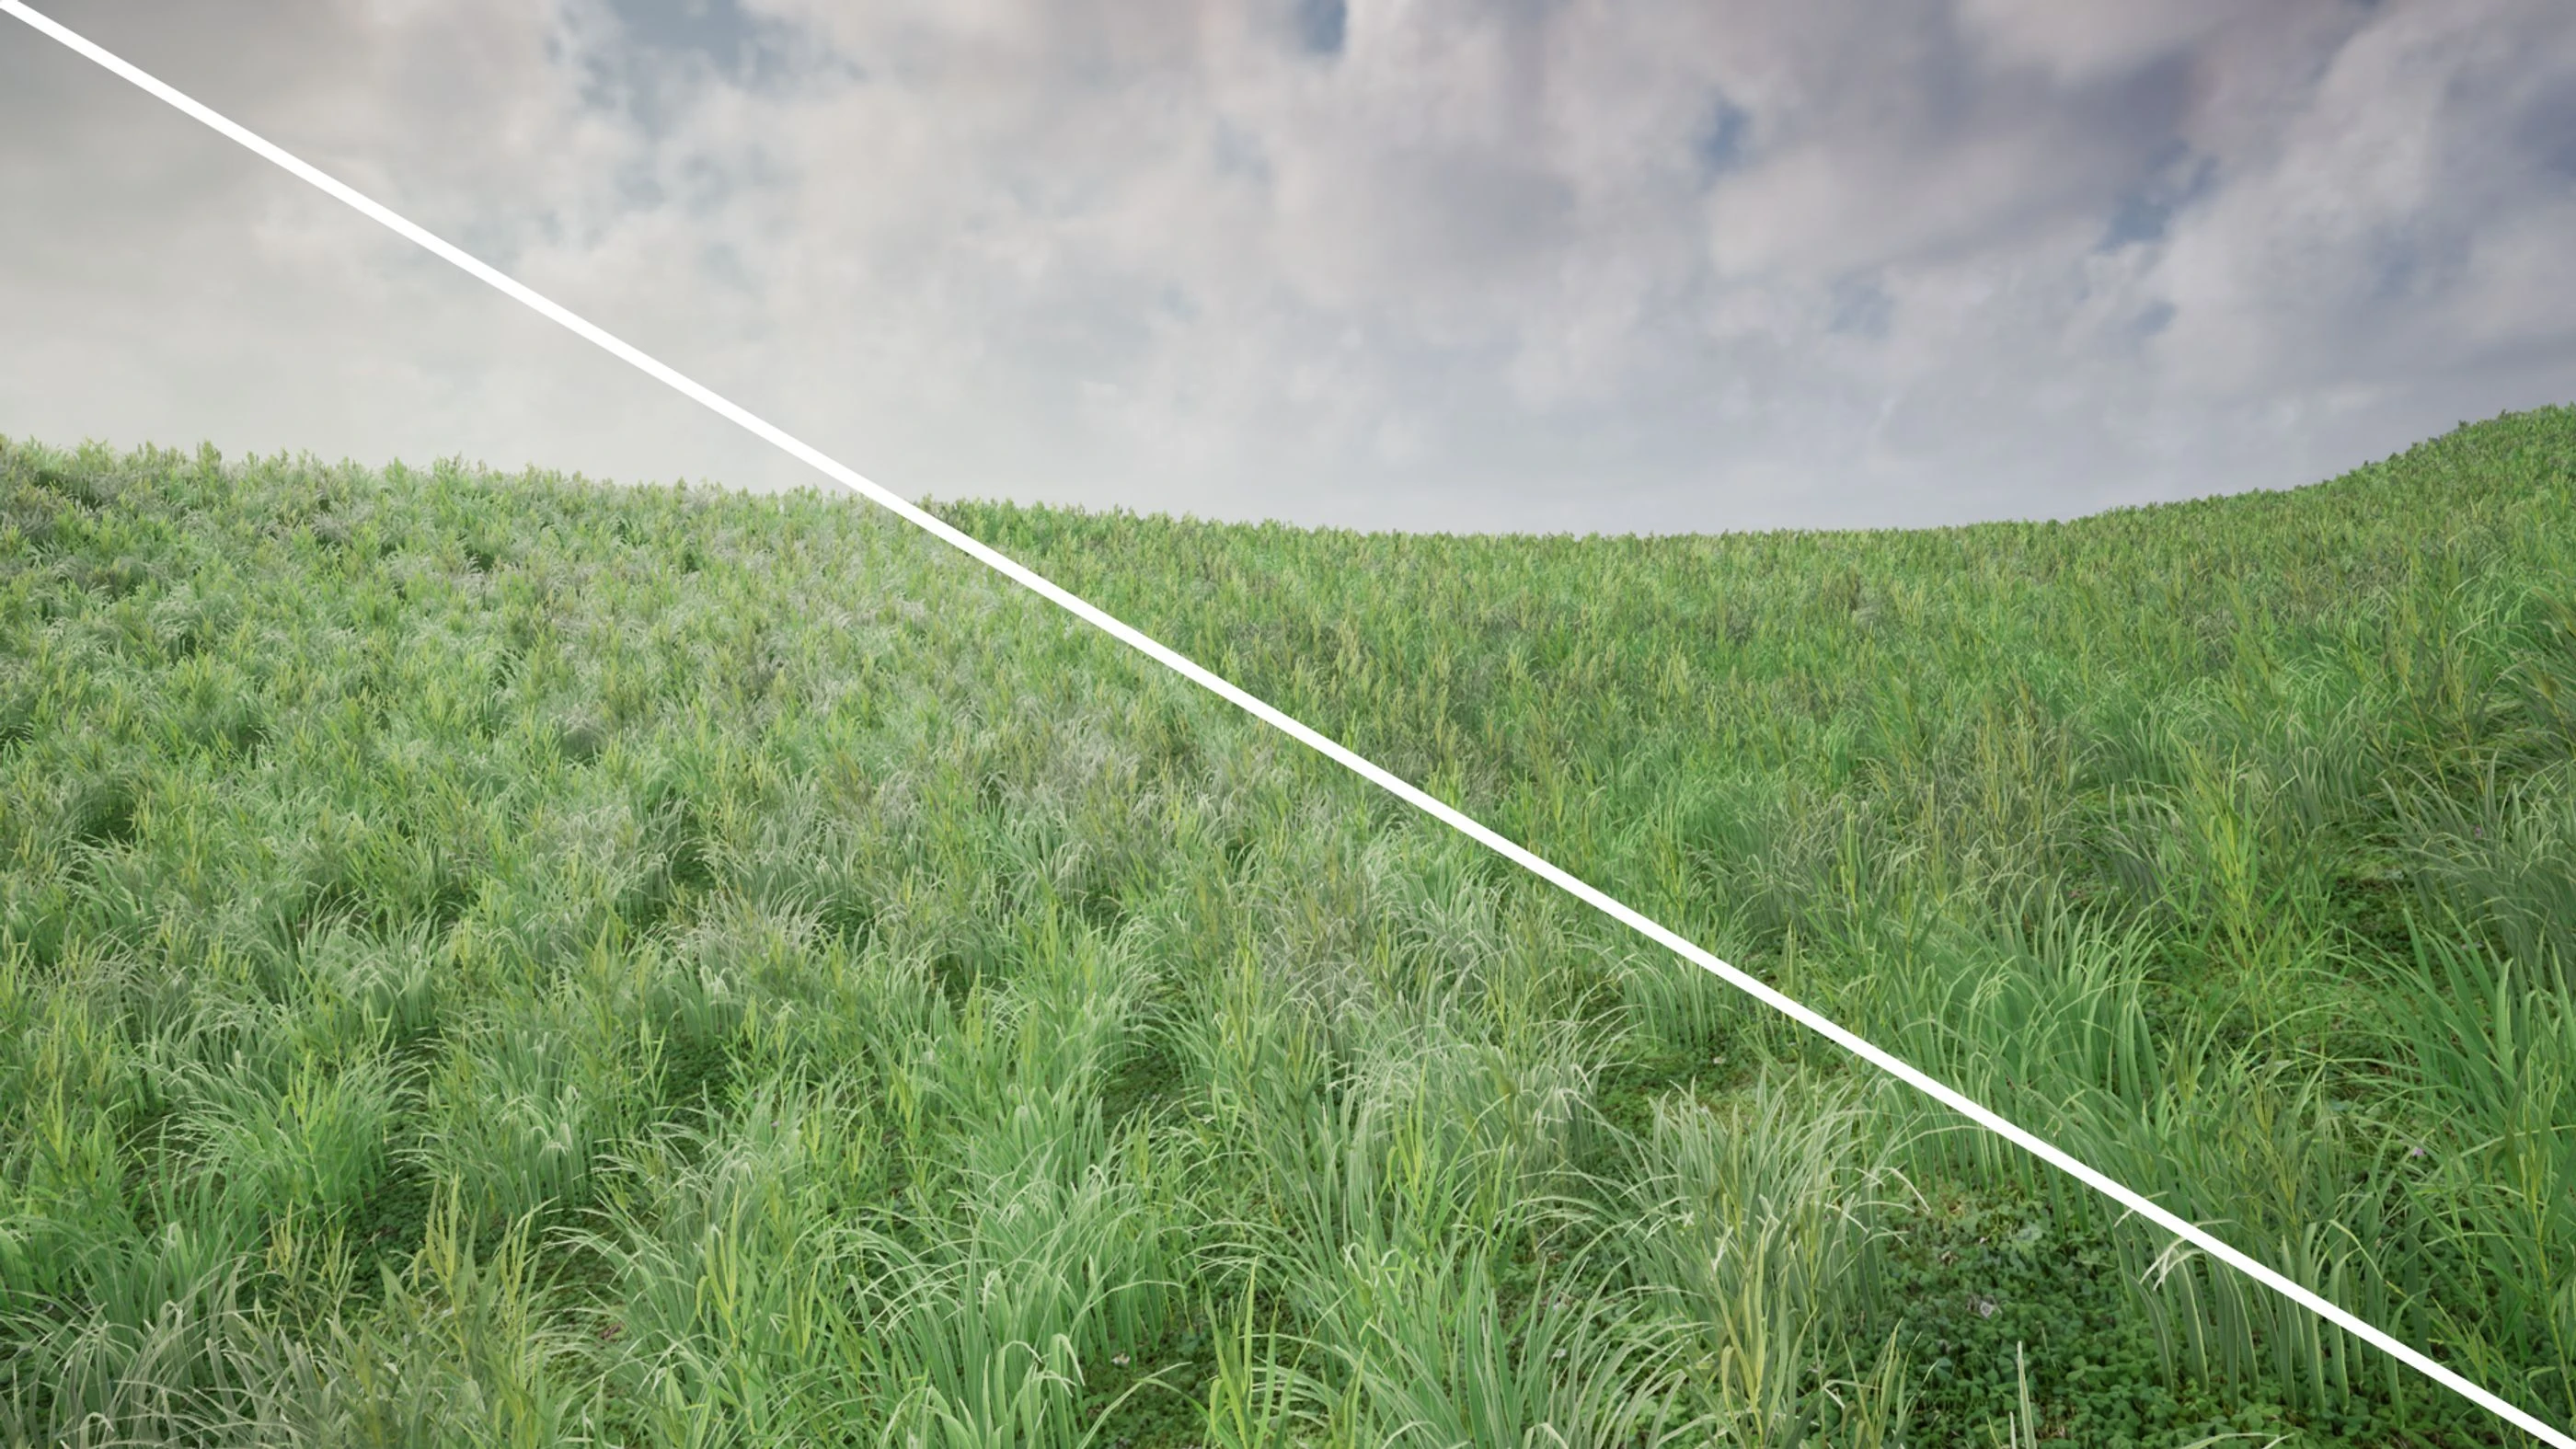
But this does not eliminate the problem 100%. To fix the problem 100%, you need to paint over the R G B channels and don’t touch alpha channel.